Carve Your Own Decoys
One of the coolest ways to elevate your hunting experience is to spend a morning hunting over decoys that you made with your own hands
One of the coolest ways to elevate your hunting experience is to spend a morning hunting over decoys that you made with your own hands

Modern waterfowl hunters have access to all kinds of high-tech gadgets that can help you put birds on the strap, but one of the coolest ways to elevate your hunting experience is to spend a morning hunting over decoys that you made with your own hands. Here are a few tips to get you started.
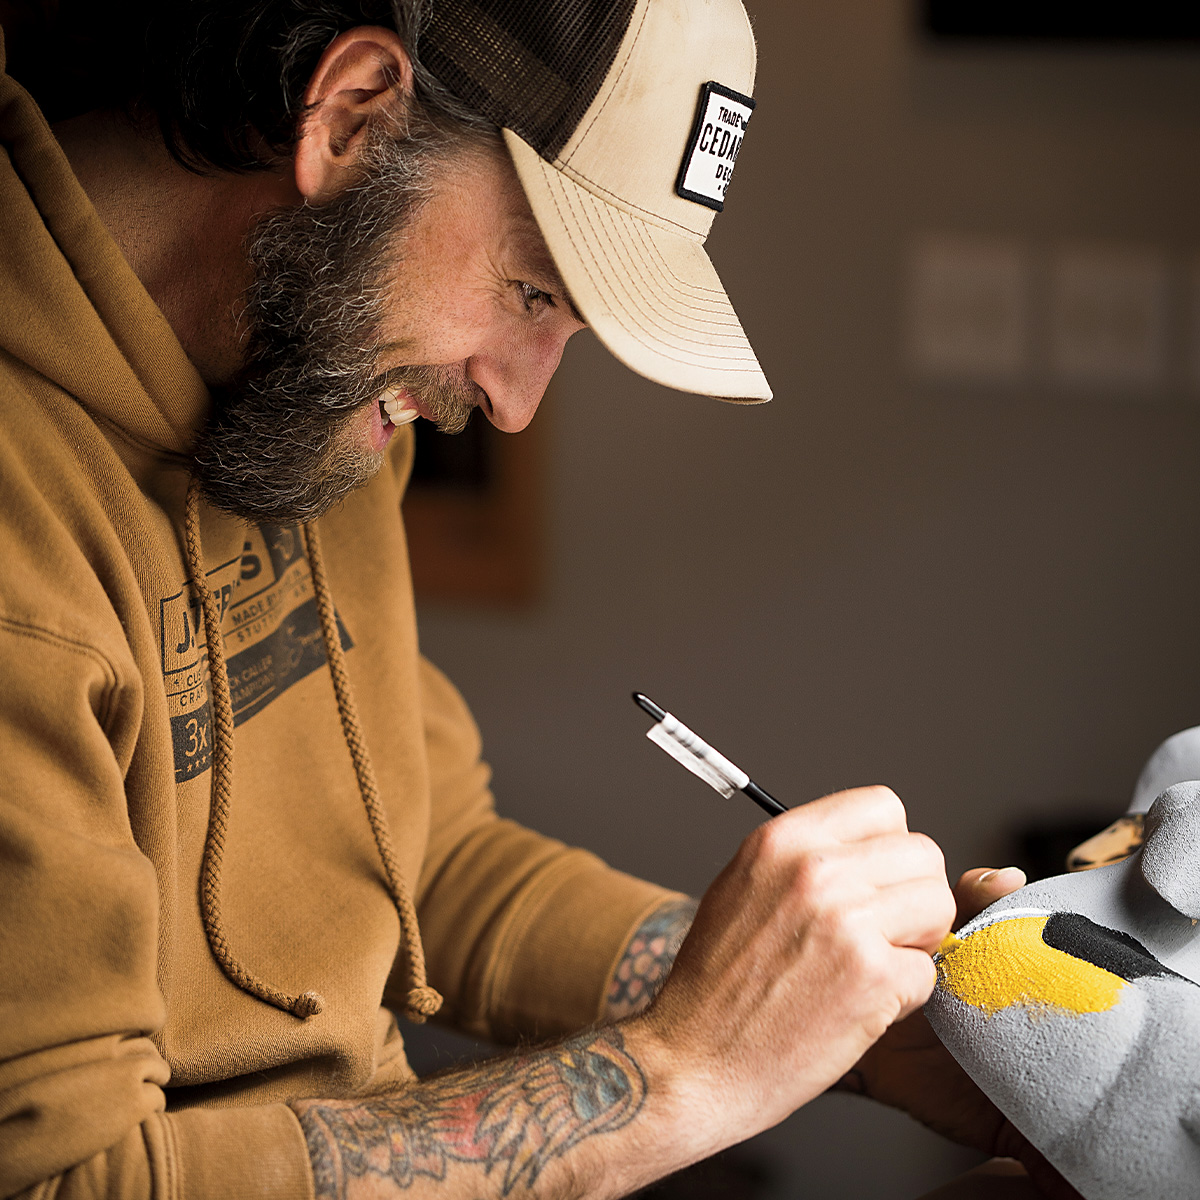
Carving a decoy requires only a handful of tools, making it a perfect project for a young waterfowl hunter, explains Corey Lucas, founder of Cedar Run Decoy Company. “If you plan on drawing out your own designs, you’ll need a band saw to cut out the patterns. If you don’t have access to a band saw, you can buy decoy kits online that include wood blanks that are already cut into the basic shape of a duck body and head,” he says. “Beyond that, you’ll need a wood rasp, a carving knife, some sandpaper or a bow sander, paint, and a handful of paint brushes. Really, that’s about it. There are modern carving tools that can make the process go faster, but simple hand tools are really all it takes to get started.”
Lucas says that soft woods like basswood and tupelo are ideal, because they are easy to work with and tend to not crack or splinter. “As a beginning carver, you can use whatever you have readily available,” he says. “If all you have is a block of pine or cedar, use it.” Regardless of what kind of wood you use, always work with the grain rather than against it to protect against splitting or cracking.
Mallards and blue-winged teal are popular species for beginning carvers, Lucas says, because a simple pattern can be used to rough out the shape of these species. You can find pre-made patterns for a variety of waterfowl species online and in books. You can also simply draw the shape of a duck on a block of wood without using a pattern. Look online for references for waterfowl dimensions, body and head shapes, and other details that will be helpful in this step of the process.
“That’s how I carved my first decoys,” Lucas says. “I scratched out the patterns on the blocks and just went from there. It made things a little harder, but it also helped me learn a lot about the process.”
With the rough shape of the decoy in hand, the next step is to add guidelines, which help identify where to carve and how much wood to remove to begin creating a natural, symmetrical shape. “This is probably one of the biggest tips I can provide: Trust your guidelines,” Lucas says. “They are so important. The only way to get that symmetry correct is to follow those guidelines, especially on the head.”
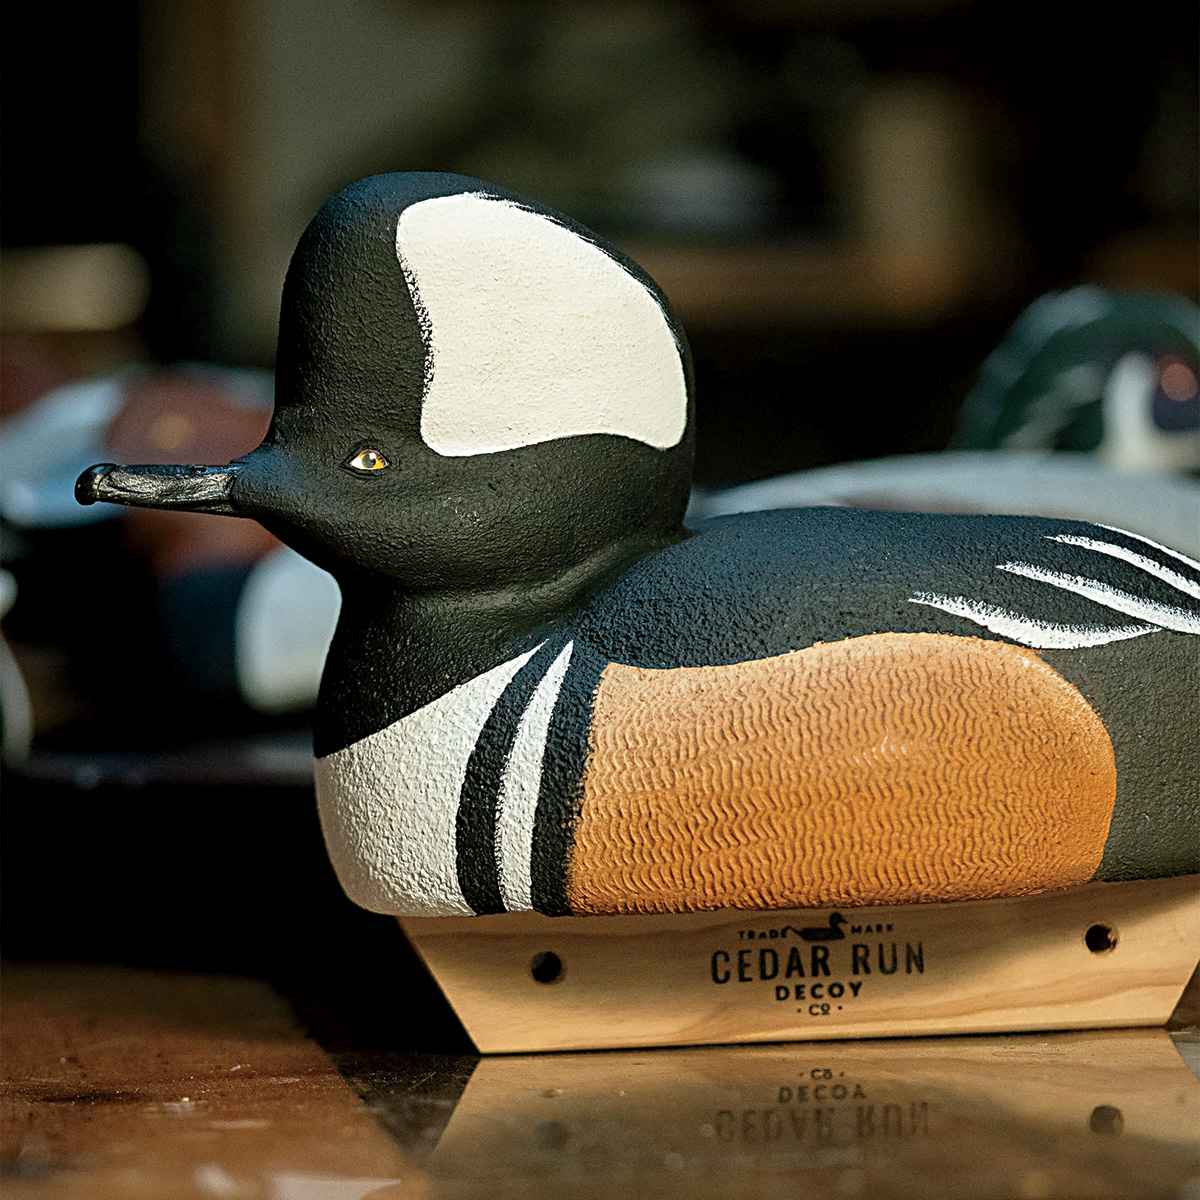
Before you paint your decoy, Lucas recommends applying multiple layers of a sealant to help protect it from water. When painting a species like a mallard, you will only need five or six different colors of flat exterior paint. Glass eyes will add a nice touch of realism, and you can add a keel or weights to help the decoy float realistically on the water.
“Be patient with yourself and the process, and don’t be afraid to reach out for help. The decoy carving community is very helpful, and there is just a ton of great information available online,” Lucas says. “Carving a decoy takes some work, but it is so worth it. You’ll never forget the first time you fool a duck using a decoy that you made with your own hands.”
Share this photo
Ducks Unlimited uses cookies to enhance your browsing experience, optimize site functionality, analyze traffic, and deliver personalized advertising through third parties. By continuing to use this site, you agree to our use of cookies. View Privacy Policy