Summer Drills for Retrievers
These training exercises will help you get your dog ready for hunting season
These training exercises will help you get your dog ready for hunting season
By Gary Koehler
While no training can be a substitute for actual lessons learned in the field, smart dog handlers recognize that off-season workout sessions are a necessity for those who want to keep their retrievers sharp and in top condition. Summer allows that opportunity.
Whether you have a pup or an experienced duck dog, the months leading up to the opening day of waterfowl season provide time to hone your retriever's skills. Time spent training not only reinforces the bond between the handler and dog but can also make all the difference in the world in determining how the retriever performs in the marsh.
A longtime handler said it best: "Everybody likes to have a well-behaved, trained dog in the duck blind. But nobody likes to be around a dog that's out of control and doesn't know what it's doing. Dogs like that can ruin a hunt."
Dog owners must be willing to put in the necessary time to develop their retriever's skills. We are not talking hours a day. Short training sessions are fine. Just be consistent, be patient, and make sure the dog understands what you are asking him to do.
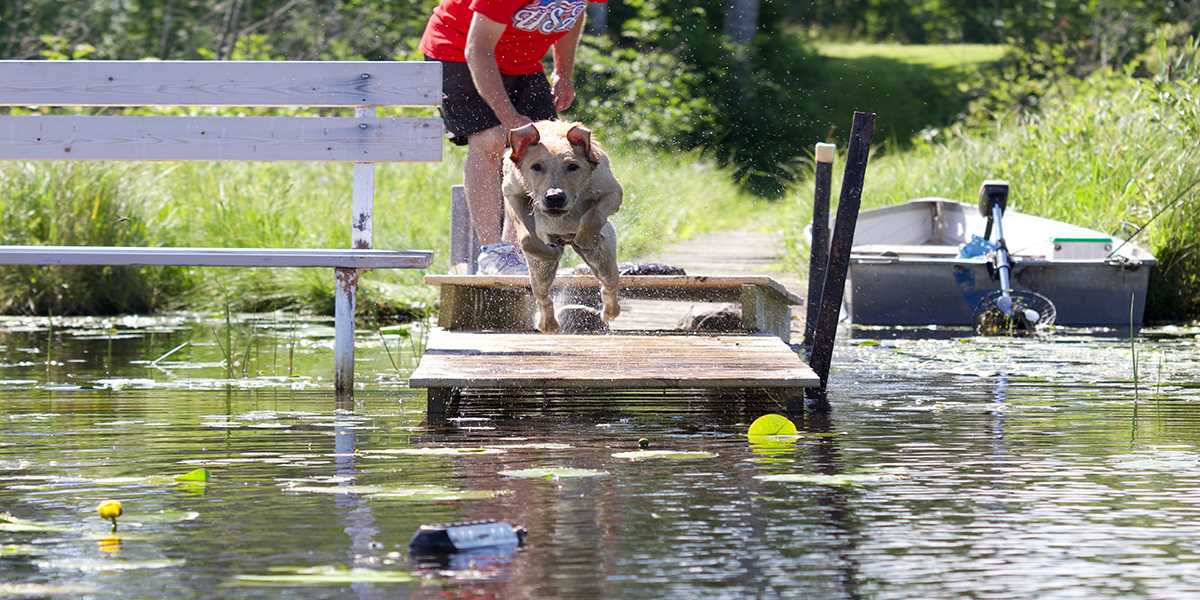
Obedience should be job one. But, in addition, there are a number of exercises that can be used to develop retrieving skills your dog will use during hunting season. Some of the drills shown here are geared toward experienced dogs. Others are more basic. You will have to decide which best fits your retriever. Make sure your dog does not get overheated on hot summer days, but by all means have some fun with your retriever during the off-season. The payoff for your efforts will come during the waterfowl season.
As a matter of course, handlers commonly toss bumpers while training their dogs. But it can be equally beneficial to place bumpers at strategic locations in advance, heel the retriever, give the dog a line, and send him after the bumpers on the ground. The cone drill plays to that teaching technique, using orange traffic cones as the target areas.
In this drill's simplest form, only one cone is needed. The handler positions the cone and two bumpers 15 to 20 yards away from the start position. Send the retriever to the easily seen cone, where the dog will find the bumper and complete the retrieve to hand. 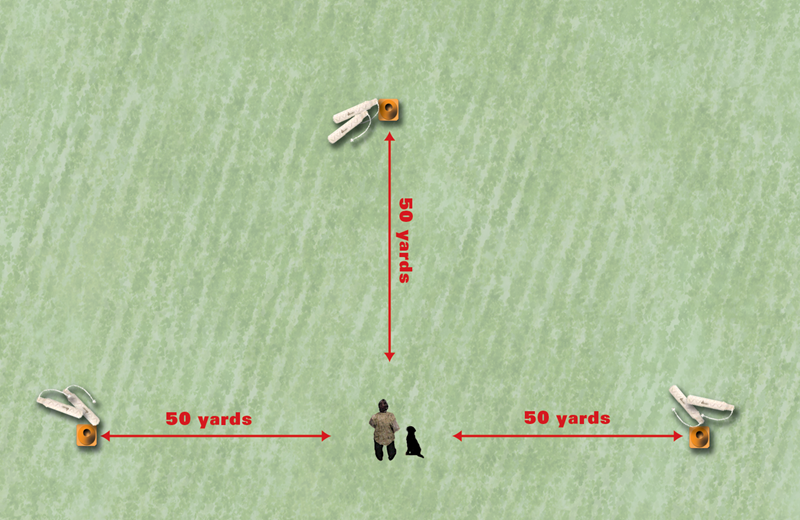
To expand this drill and extend the length of the retrieves, use three cones, each set 50 yards from the start point, with two bumpers located at each cone. Heel the dog to your side and give him a line to the first cone. Be patient. It is not unusual for a dog that has become used to less lengthy retrieves to stop short of the 50-yard cone. It may take some time for the dog to learn that he must go the distance to find the bumper. The handler may need to move closer to the cone, send the dog, and then retreat to the desired distance as the dog is running to the cone.
Once the dog successfully completes a retrieve from the first cone, rotate toward the second, give the dog a line, and send him to the second and ultimately the third cone. Once the lesson is learned, alternate the order of the retrieves. Your retriever is now learning to follow your instruction, which is a major step before advancing to blind retrieves.
The Wagon Wheel drill is an ideal way to begin working young retrievers on lining. This exercise also provides the dog practice at realigning at heel as the handler turns in different directions to face the bumpers. The four bumpers should be set approximately 10 yards from the center of the wheel at positions A, B, C, and D. Short grass is preferred so that the dog can easily see the bumpers.
Stationed on the X, the handler should align the dog at his or her side, place a hand just above the dog's head, and when the dog is looking at the bumper, send him with the "back" command. Make sure the dog is sitting straight and facing the bumper before sending him on the retrieve. 
Go one round clockwise and then reverse the order and work the dog in a counterclockwise rotation. If the dog goes to the wrong bumper, a correction is needed. Stop the dog, bring him back to you, and start over. If the dog keeps making this same mistake, move closer to the bumper before sending the dog.
Young dogs sometimes develop a tendency to go back to the last place where they picked up a bumper. The triple line drill can be used to counteract that tendency and to refine your retriever's skill in taking a line. A large field with relatively light cover is the ideal setting.
These retrieves should be undertaken on a step-by-step basis. First, handling your dog from Point A, do two repetitions of a sight blind planted at location X1. Next, handling your retriever from the same spot, do two repetitions of a sight blind planted at location X2. Third, send the dog on two repetitions to a sight blind planted at location X3. After completing those six tasks, vary the order of six additional retrieves. 
If your dog takes off for a retrieve other than one for which you lined him up, stop the dog with the whistle and cast him back to the proper line, or call the dog back and start over. Make sure the dog understands your lining instruction.
As your dog progresses and is consistently retrieving bumpers after being released from Point A, you can move back 10 yards to Point B. When the dog accomplishes retrieves from that position, move back 10 more yards to Point C and, finally, to Point D.
This should not be undertaken in a single outing. Also, keep in mind that since the dog will be running longer distances as you move from Point A to B, take a little longer between retrieves to let the dog catch his breath. Be careful not to overdo this drill in warm weather.
During a duck hunt, several birds often fall from a single flock, presenting retrievers with multiple retrieves. Training for this scenario begins by enlisting some help. Two assistants can help you efficiently carry out this important drill.
As the dog's handler, you should select a position and then assign your helpers to separate stations, one 20 to 25 yards to your left and the other 15 to 18 yards to your right. Your retriever remains at your side until one assistant tosses a bumper, at which time you release the dog.
Have your bumper throwers take turns. After your dog successfully retrieves each of these bumpers, switch over to having your helpers throw doubles. Have one assistant toss a bumper. After the bumper drops, carefully turn your dog in the direction of the other assistant and have that person toss a bumper. Line your retriever and send him after one of the bumpers. When the dog returns, take the bumper from his mouth, line him up for the second bumper, and send him. If desired, you can reverse the order of retrieves on the second round. 
Duck hunters with young dogs would be well advised to concentrate on instilling basic obedience in their retriever before moving on to more complex field training. The seemingly simple stuff-the sit, come, heel exercises-lay the groundwork for all training to come later. There are plenty of books and videos available describing in detail how to begin obedience training. But, if you are still unsure how to proceed, register your dog in a structured obedience class. Such classes typically run from six to eight weeks, with participants meeting with an instructor one or two hours per week. Dog socialization while attending these classes is another plus.
Share this photo
Ducks Unlimited uses cookies to enhance your browsing experience, optimize site functionality, analyze traffic, and deliver personalized advertising through third parties. By continuing to use this site, you agree to our use of cookies. View Privacy Policy